Chocolate Bunny Ear Cupcakes
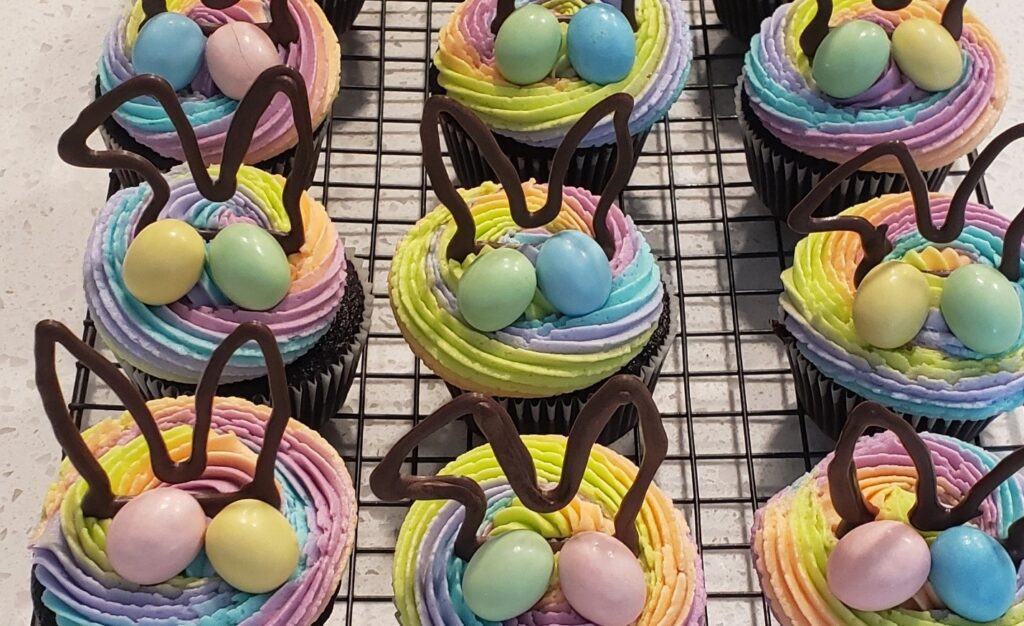
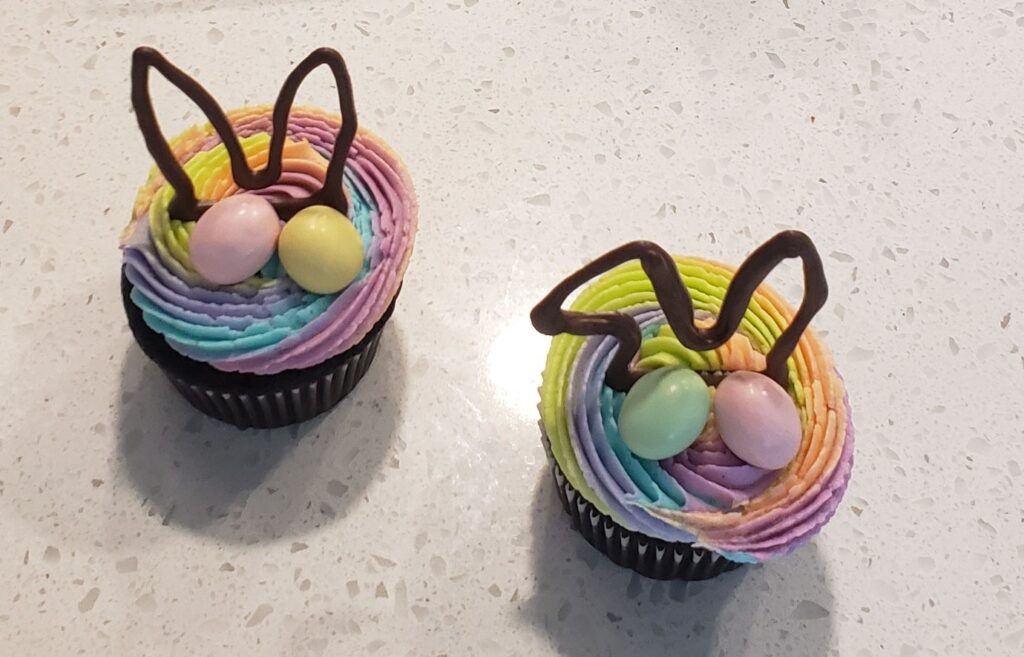
These chocolate bunny ear cupcakes are sure to be a show stopper!
Holidays are always a great reason to get together with family and Easter is certainly no exception. Many of us have fond childhood memories of colorfully dying Easter eggs and the thrill of hunting for them on Easter Sunday. The very best eggs were the plastic ones filled with sweet treats. The frenzied running around attempting to find all of the eggs before anyone else. The sweet victory when your basket was full and there were no more eggs left to find. Cracking open the plastic eggs to discover exactly how many of your favorite candies you’d managed to scoop up was really the very best part!
Easy and Exceptionally Tasty? Yes!
Rather than buying the usual tasteless cupcakes from the market as an afterthought, while you’re working your way through the aisles of the market making sure you have all of the ingredients for the dishes you’re planning on preparing, why not give these fun whimsical bunny ear cupcakes a try? They are sure to be a huge hit with your family and don’t take a lot of time to whip up.
Secret Ingredients: Olive Oil and Buttermilk
These are not your typical chocolate cupcakes either, they have a heavenly, rich, soft crumb that you will want to make your signature, go-to chocolate cupcake recipe. Two of the key ingredients that help achieve this over-the-top delicious cupcake are olive oil and buttermilk. Trust me on this! Really, really good chocolate desserts all have one thing in common, they’re rich and balanced, not too sweet, not too bitter, and the texture has got to be creamy and smooth.
Yes, Olive Oil
This chocolate cupcake recipe is all of those things. I incorporate olive oil into most of the baked chocolate desserts I make, particularly cakes and cupcakes, and have found that this gives my cakes and cupcakes a much more moist, tender crumb than I would get from other oils. If you are worried that you will get an olive oily taste in your cake, don’t. I have made many cakes substituting olive oil for other oils and have never once had anyone say they can taste the olive oil. In fact, the comments I do get are only those of sheer amazement over the tastiness of the cake itself.
And Buttermilk? Absolutely!
This isn’t due to the olive oil alone though; buttermilk is also a key ingredient in my chocolate cake and cupcake recipes. Buttermilk is not simply a combination of butter and milk contrary to what the name may imply. If you have ever tasted buttermilk you know that it has a very tangy or sour taste, along the lines of plain yogurt or sour cream. When used in baking though, and in combination with baking soda or baking powder, a chemical reaction occurs between the ingredients during the baking process culminating in a delightful, soft, and tender crumb. The combination of buttermilk and olive oil is what really makes the texture of this chocolate cupcake recipe a staple for anyone who tries it.
I would highly recommend giving this recipe a try for yourself and wait for the compliments to come pouring in.

Chocolate Bunny Ear Cupcake Recipe
Ingredients
Chocolate Cupcakes
- 1 cup (130 grams) all-purpose flour
- 1 cup (207 grams) sugar*
- 6 tablespoons (43 grams) Hershey’s Special Dark Cocoa powder
- 1 teaspoon baking soda
- ½ teaspoon kosher salt
- 1 large egg
- ½ cup (120 milliliters) buttermilk**
- ½ cup (120 milliliters) olive oil, (or other vegetable oil if you do not have any olive oil)
- ¾ teaspoon vanilla extract
- ½ cup (120 milliliters) hot water
American Buttercream Frosting
- 2 cups (434 grams) unsalted butter at room temperature
- 8 Cups (907 grams) confectioners’ sugar
- ½ teaspoon (3grams) kosher salt
- 2 tablespoons heavy cream (or whipping cream)
- 1 tablespoon vanilla extract***
Instructions
Bunny Ears
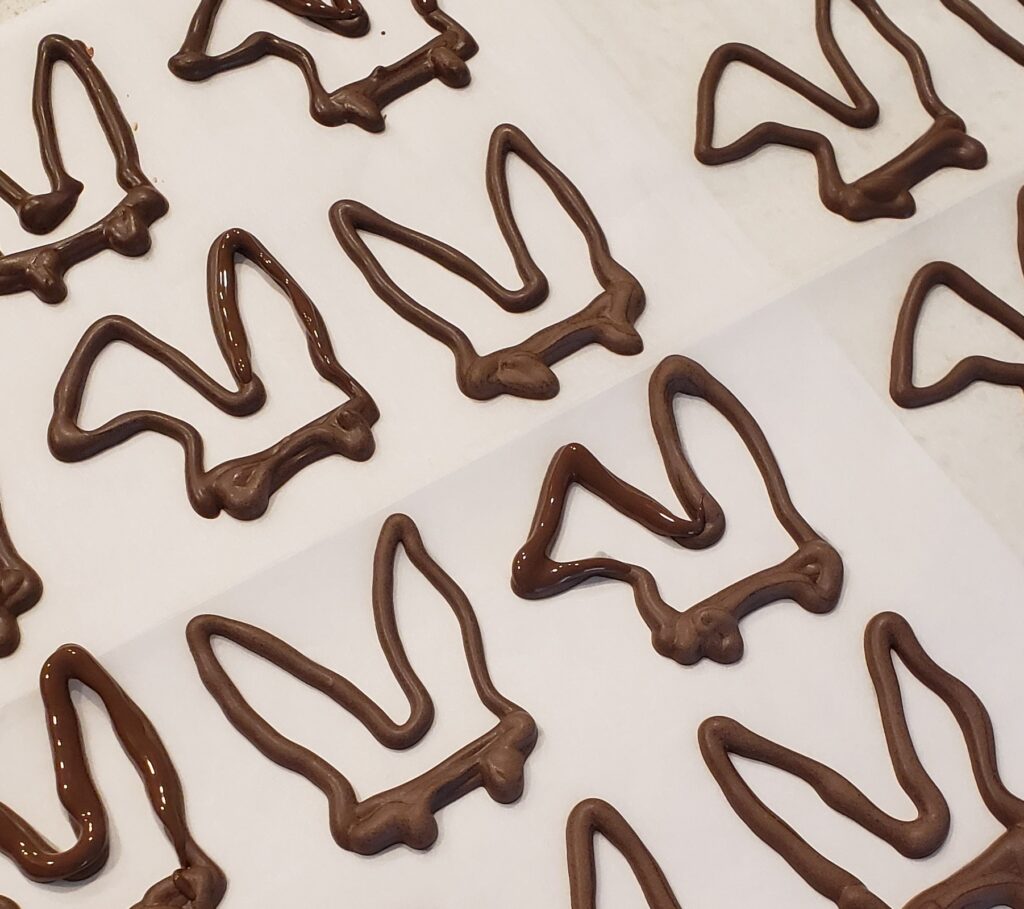
In a microwave safe bowl add about half of a bag of chocolate chips, I prefer Ghirardelli bittersweet chocolate but any chocolate chip should work. Place the bowl of chocolate chips in the microwave and heat in thirty second increments at a time stirring the chips well in between heating. Heating chocolate can be tricky as they will keep their shape even if they are melted so be sure to stir well in between heating as over heating the chocolate will cause it to burn and turn chalky and become unusable.
Pour the melted chocolate into a piping bag fitted with a small round decorating tip (such as a Wilton #4 or #5 decorating tip), you want a thin, but not too thin, line to work with that you will be able to handle and push into the frosting without braking. In my experience, it’s best to let the chocolate cool just a bit before piping as well as it’s easier to control and won’t run too much when you are attempting to pipe along an outline. Once you have traced all of the ears set them aside to set while you work on the cupcakes and frosting.

Chocolate Cupcakes
- Preheat the oven to 300ºF (148ºC) and prepare a cupcake pan with liners.
- Add the dry ingredients to a large bowl and whisk them together until thoroughly combined. Set aside.
- In a smaller bowl, whisk the egg, buttermilk, olive oil, and vanilla until combined.
- Add the wet ingredients to the dry ingredients and stir together.
- Add the hot water to the batter and mix, the batter will be thin.
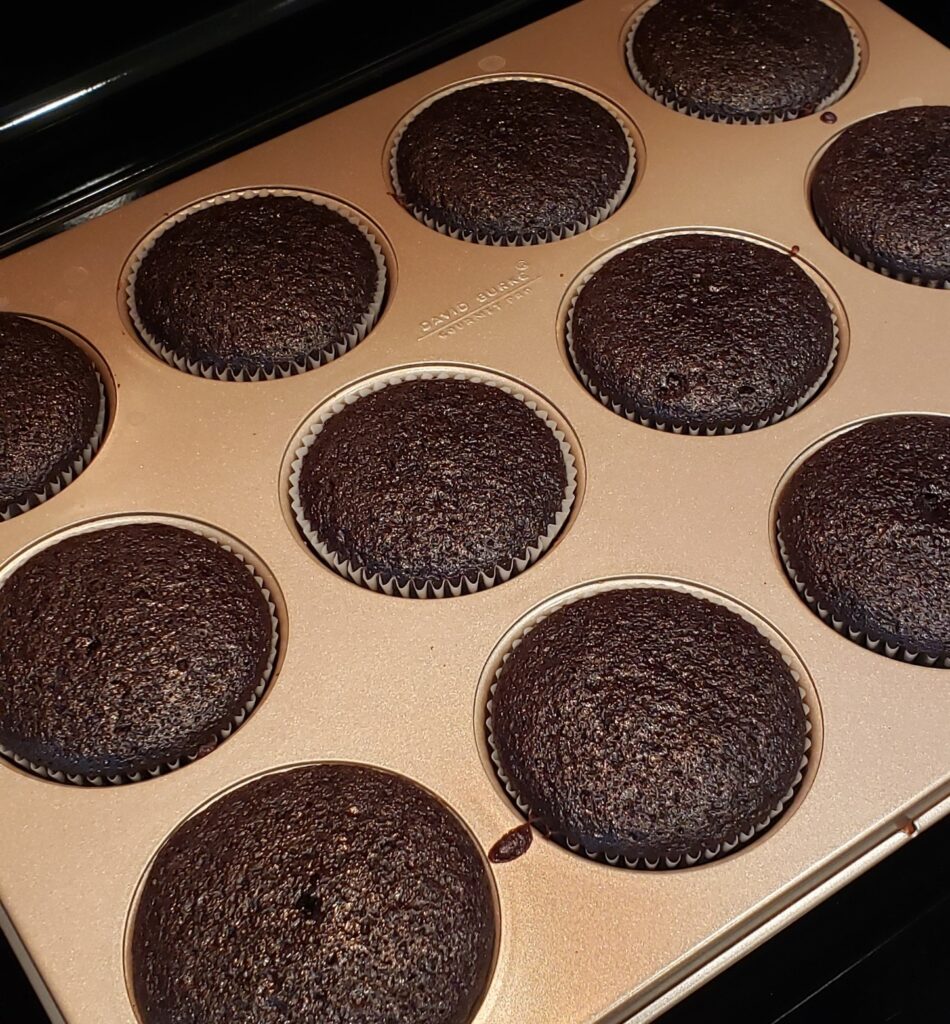
- Fill cupcake liners about halfway and bake for eighteen to twenty-three minutes. A toothpick inserted should come out with just a few moist crumbs on it.
- Remove the cupcakes from the oven and let them cool slightly before transferring them to a cooling rack.
- Let the cupcakes completely cool before attempting to frost them with your buttercream. Frosting before the cupcakes are completely cool may cause the buttercream to melt and make a mess of your cupcakes.

American Buttercream Frosting
- In the bowl of a stand mixer, beat room temperature, unsalted butter on medium speed with a paddle attachment for 1 minute.
- Add the vanilla extract*** and salt, and mix at low speed.
- Slowly add the confectioners’ sugar, one cup at a time, allowing the sugar to be completely combined before adding more.
- Alternate splashes of heavy whipping cream in between additions of the confectioners’ sugar.
- Continue to beat the mixture at a low speed until all of the ingredients have been fully combined ****
- If you are planning on coloring the entire batch of buttercream the same color add the gel food coloring at this point. That is, after the mixture has been fully combined. Beat on a low speed until you have reached the desired shade. I would recommend adding the gel coloring a little bit at a time since you can always add more to reach the perfect shade. Once color has been added it cannot be removed.

Assembling the Bunny Ear Cupcakes
If you plan on using a few different colors, as I have, divide the finished buttercream evenly into separate bowls. Then add different gel color to each bowl, and mix well until there are no longer any white streaks.
To create a rainbow effect, place a piece of plastic wrap on a flat surface. Spread each color of buttercream evenly onto the plastic wrap. Once you have added all of the colors pull one side of the plastic wrap over the buttercream and roll. You will have somewhat of a tube shape, cut off the excess plastic wrap from one end and place the tube of multi-colored buttercream into a piping bag fitted with your choice of piping tip. I used an open star or a Wilton 4B more specifically.
Once you have frosted the cupcakes carefully place the chocolate bunny ears into the frosting. I also added chocolate Easter egg candies to mine for a little extra detail and fun.
Recipe Notes:
* I like to use bakers’ sugar as it is finer than regular granulated sugar and therefore dissolves more quickly. Baker’s sugar particularly useful when you need the sugar to dissolve completely to get the texture just right.
**If you don’t have buttermilk on hand you can make it in a pinch using regular milk and either white vinegar or lemon juice. To make 1 cup of buttermilk, combine 1 tablespoon of fresh-squeezed lemon juice or white vinegar and add the remainder of one cup with milk. Let the mixture sit for five to ten minutes and voila, you will have an easy buttermilk substitute. After the five to ten minutes have passed you will notice the mixture has slightly thickened. You will notice small bits of curd as well. Don’t be alarmed, this is what you want to see.
***Feel free to explore flavors other than vanilla as well here. I sometimes will do a mixture of vanilla and caramel to give the buttercream more depth of flavor.
**** If your buttercream is:
- too thick you may want to add a few additional splashes of heavy cream until you reach the desired buttercream consistency.
- too thin, slowly add in a tablespoon of confectioners’ sugar at a time until the consistency is right.